


One of the most challenging things for experienced and inexperienced shooters alike is to remember and bring together all the fundamentals of shooting for accurate hits and do this quickly in a self-defense situation, range shoot, competition, combat encounter, or even casual plinking. Usually we have a very limited amount of time to recall, focus on, and implement the basics, especially if we are involved in high-speed defensive or combat shooting for self-defense. So our tendency while learning and practicing is to speed up and go fast through the fundamentals. Perhaps, overlooking some basics or spending a very limited amount of time on certain key ones, thus neglecting proper concentration on important techniques that directly affect our accuracy. But this is precisely what we do NOT want to do when initially learning, applying and practicing the shooting basics. Initially, we must go SLOW, have a PLAN for focusing on the fundamentals, and be Deliberate with a Process when learning and practicing SPECIFIC skills and techniques, rather than just throw lead down range. We can always speed up later when our skill and comfort levels improve. I see this a lot in new shooters; the tendency to hurry and rush the shot as if to quickly get it over with, rather than deliberately focusing on the guiding principle for the fundamental and having a specific guideline or routine process or checklist to guide them. Like Vince Lombardi the famous football coach said “You can’t be successful or improve in anything you do without focusing on the basic fundamentals.”
While there is no one best UNIVERSAL shooting grip, stance, sight alignment, sight picture, trigger control, hold control, follow through, etc., there are certain fundamentals and techniques that CAN be learned and CAN be applied to improve accuracy. Some “Experts” disagree on what even the basics really are, let alone how to apply them. The bottom line is what really works for YOU; but a big caution is to be open and receptive to different approaches, techniques, and basics, so you can have options and determine what does work for yourself. So it is best to take the time up front and learn the fundamentals with an experienced and successful firearms instructor and then decide for yourself by practicing them. Spend the time to do this, rather than having to unlearn some bad habits and techniques and relearn optimal ones later. The real gold-standard test for this is your actual ACCURACY, even if it goes against the accepted fundamental standard or shooting association’s recommended practice. However, be OPEN to what experienced and successful instructors and shooters have to say and consider your options. Think it through and discover what works for YOU and do it consistently.
Don’t keep changing among various grips, stances, techniques, etc. based on the latest expert’s in-vogue idea or theory. I have had some students say after one brief class session that the “two-thumbs down range grip is not for me because it feels uncomfortable or expert ‘X’ doesn’t recommend it.” However, I always ask that they give it a chance over some range practices and take their time, then select one, and stay with it IF it leads to better accuracy. You can always change later if you note consistent decreases in accuracy. An example that comes to mind is me. I know the accepted basic technique is to shoot with both eyes open. The NRA and my instructor friends even say that it is best to keep BOTH EYES OPEN while aiming, as more light is available to the eyes, depth perception and peripheral threat vision is usually better, and facial contortions and muscle tension are usually reduced or eliminated. It is usually quicker for a defensive encounter to shoot with both eyes open to stop the threat. As some argue, maybe even repeated shots in the same center mass location on the bad guy are not even optimal for maximum damage in a close-up encounter. But, if I have time for distance shots especially and want precision and consistent bullseye hits, I will close my non-dominant eye and carefully aim. This works for ME, but decide for yourself. For close-up defensive shooting I may, however, want a quick two shots to center mass and not be as concerned with very precise (kill) hits, but just to STOP the threat. I am constantly practicing this and have a way to go for my improvement. Of course, I believe concentration should always be on the front sight. Some even disagree with this; so there are other considerations for your decisions. Keep in mind that the initially quickest method on target isn’t always best for long-term, sustained success and precise target hits, depending on your goal and situation. So, given your goal, distance, type of event or scenario, firearm type, and existing situational awareness factors, the gold-standard test is the desired bullet strike(s) on the target or threat and desired precision.
I have had some students tell me that even after considerable practice they could not acquire the front sight (or had extreme difficulty doing so) with both eyes open and if they did, they were consistently off from their intended point of impact. It was too confusing for their brain to clearly sort out the images. Of course, a lot of factors could affect this, like usually being right eye dominant, but at near distances being left eye dominant, having other medical or physiological concerns, or not practicing thoroughly and frequently. I recall one concerned shooter whose left eye was nearsighted and whose right eye was farsighted. Shooters who are farsighted (hyperopia) see things at a distance more easily than they see things up close. If you are farsighted, close objects may be so blurry that you can’t adequately hit your nearby intended point of impact, with one or two eyes open. A farsighted eye sees things differently than an eye that is not farsighted. So there are many factors that affect personal aiming and one or two eyes being open. You must be aware of your personal factors, decide for yourself, and then practice.
For me, I have learned that I am much more accurate in various situations if I shoot with my dominant eye open and my support eye closed. I always shoot this way, no matter what the distance, event or situation and have found it to work for me, albeit I am not a Doug Koenig, Rob Leatham, or Max Michel. I do know that Consistency equals Accuracy. I have proven this to myself and others that this is especially true while learning and applying Trigger Control. Our goal should be to learn the fundamentals and gradually speedup our progress through them and with the shots we take. Don’t rush your shots initially in your learning process for long-run success in retaining proper fundamentals and for accurate target hits. This is so easy to say, but I find myself rushing through the fundamentals so quickly sometimes and hurrying to take my shot. So I needed a simple guiding process that I could remember and recall quickly to help me focus and apply key basics to be more accurate. Thus was born my easy-to-remember 1-2-3-4 Process for Shooting… or my over-simplified Checklist. It’s simple, easy to remember, and works for me and many of my students, so I offer it to you for just your consideration. Try it and I hope it helps you also. More to follow below.
While ALL shooting fundamentals are important, if I had to pick (and I wouldn’t want to do this because I might neglect the others) to me the most important basics would be Sight Alignment and Trigger Control. Of course, the GOAL of the accurate shooter must be to learn to align the sights properly (vertically and horizontally) and keep them on the target (Sight Picture), while at the same time smoothly and consistently pressing the trigger straight back with little movement until the gun discharges. This seemingly very routine and easy (but very challenging) foregone conclusion and process must occur in high speed defensive shooting, various self-defense scenarios, plinking, competition, and in range practice sessions. Naturally, the time it takes to complete the process is compressed in combat, competition, or defensive shooting. Recognize that even if a shooter has a perfect Sight Picture for a shot, if his/her Trigger Control is poor enough to pull the sights off target when the trigger is pressed, he/she will miss the shot, and more often than not, by quite a bit. On the other hand, if one’s Trigger Control is perfect but their Sight Alignment/Sight Picture is a little off, the shot will very likely still hit the target, although it might be in the 9 ring instead of the 10 ring. So I use a simple Checklist approach when shooting to help me focus on the most important of the fundamentals… sight alignment and trigger control. Again, I call it my 1-2-3-4 Process for Shooting.
Assuming (BIG assumptions) we have decided on our particular Grip and know its fundamentals, Stance and know its fundamentals, Aiming, Sight Alignment & Sight Picture, know to hold and when to hold our Breath, can control our trigger and movements, and Follow Through appropriately, let’s focus on the 1-2-3-4 Process, a very important checklist for focusing on the two most important fundamentals, sight alignment and trigger control. I use it and teach it to my students. My 1-2-3-4 Shooting Process consists of these 4 steps each time I fire my firearm. I say “1-2-3-4” to myself, knowing that I want to:
- ONE- ALIGN front and rear sights (vertically and horizontally);
- TWO- Focus ONLY on the FRONT sight;
- THREE- Hold your BREATH; and
- FOUR- PRESS the trigger (straight-back, smoothly, not stop-and-go, & ONLY trigger finger moves.)
As I have become more proficient and practice more, I speedup my time moving from step to step, being very careful NOT to especially rush the fourth step… to me the most important Basic… PRESS and control of the trigger. Now usually I go very quickly and automatically through the 1-2-3 steps, but still say them to myself to remind me of their importance.

The fourth step is very important, so there are (at least) 4 focus factors in Trigger Control to help with our Accuracy:
(1) Trigger Finger Contact: The middle of the first “pad” of the shooter’s index finger should contact the center of the face of the trigger. It is also acceptable for the contact to be to the end of the first pad or to the first crease or joint of the trigger finger, but NOT on the very tip or beyond the first crease toward the second crease. The shooter’s trigger finger length, the type of gun action (e.g. double action vs. single action), personal preference, proven accuracy hits, and other factors determine the optimum contact point for the shooter’s contact point on the trigger. So, the contact point varies. For my personal finger length and preference for single-action pistols, I mostly use the middle of the first pad of my trigger finger. However, for a double-action gun you might get more leverage if the contact is at the first crease or joint of the trigger finger. Decide for yourself, again with accuracy being your gold standard. For certain, the trigger finger should not touch the frame of the gun. Ideally, the only place the trigger finger should contact the pistol is on the face of the trigger.
Correct Finger Placement on the trigger is dependent on the type of trigger action (single, double, double-single, etc.) you are operating. The placement should allow you to press straight to the rear without any lateral deviation in pressure. Also, placing too much of the finger or not placing enough finger on the trigger will cause your shots to hit laterally on the target. Such extremes in placement will cause you to exert pressure to the side as well as the rear with resulting poor target hits. Too LITTLE trigger finger usually results in left side and high target hits. Too MUCH trigger finger results in right side and high hits. While tightening fingers (milking) or jerking the trigger usually results in left side and low hits. Tightening the grip while pressing the trigger, results in right side and low hits.
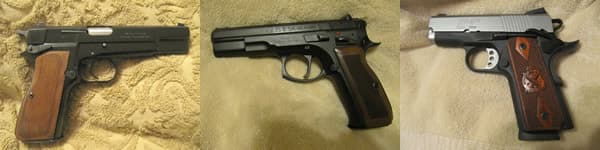
Some triggers are easier to operate than others, but they all can usually be managed with enough training. With single action triggers (e.g. my Browning Hi-Power, CZ 75B SAO, Springfield EMP,1911s- Colt, Kimber) the middle area of the first pad of the finger seems to be more effective for me. When using a Glock, M&P, Springfield, and striker-fired pistols, the area between the pad and the first joint will usually allow me the best control and better accuracy, given the half-cock feature. It varies, so determine this for yourself. Generally, if you are using a double-action firearm (e.g. my Ruger SR9 and Ruger LCR), you must usually place much more finger on the trigger in order to provide the leverage necessary to operate the heavier trigger press. For these double-action firearms shooters, the area at the first joint (or even slightly just above the first joint) will be more effective. While this is controversial and varies by individual, try the different finger placements to decide for yourself.
(2) Pre-Travel or Slack: Semi-automatic pistols have “slack”, “takeup”, or “pre-engagement travel” built into their actions. Some more than others. This Pre-Travel is a slight rearward movement in the trigger, prior to the actual trigger press occurring and before the Sear moves and the gun fires. The Sear is the part of the trigger mechanism which holds the hammer or striker back until the correct amount of pressure has been applied to the trigger; at which point the hammer or striker is released to discharge the firearm. The shooter can feel a distinct difference in the amount of trigger finger pressure needed to take up the slack as opposed to that pressure needed to make the gun go bang. My H&K P30 DAO has a very long pre-travel that I must definitely practice with, but the 4.5 psi Lite LEM V1 trigger press accuracy makes up for it. It is very different from the Single Action short and light presses of my M&Ps, 1911s, Sig P238, CZ 75B-SAO, Browning Hi-Power, and Springfield EMP with between 4-4.5 psi presses and short pre-travels. As the sight picture is acquired with my P30, the trigger finger contacts the trigger initially and moves backward to remove the slack. The slack is taken up BEFORE the actual trigger press, so that the trigger finger can feel the trigger press resistance.

Double-action revolver triggers (like my Ruger LCR) do not have Slack in them, but there are considerations for them in the process. It is important with the revolver to move the trigger all the way to the rear to fire the gun, then let it roll back all the way out before starting on the next trigger press. The revolver trigger must go all the way forward or you can skip a chamber or even lock up the action, called “short stroking.” The double-action trigger should be pressed all the way to the rear in one smooth, non-interrupted motion, then allowed to roll forward all the way.
(3) Trigger Press: This is a very key part of the trigger action and directly influences Accuracy. I constantly work on my mine. The action is not a trigger pull, squeeze, or jerk, but rather a controlled distinct press straightback of the trigger in a smooth, continuous, non-intermittent motion. There is no “stop-and- go” action, the pressure applied is steady and uniform, and the only thing that moves on the trigger hand is the trigger finger itself. All other fingers and the hand should be kept still with a locked wrist, without any milking or squeezing motion. Since it is natural for all fingers to move and close together, one must focus on keeping all fingers but the trigger finger from moving. This movement of other fingers is called “Milking the Trigger” and results in low misses on the target. For right handers, the misses are usually low and left, with the opposite occurring for lefties. So, be on the lookout for this error. As the lower fingers tighten their natural grip, the muzzle of the barrel is pulled downward (usually at the very last second) as the gun fires. Often we do not even know that we are doing this. Instead, we want to “press” only the trigger, with steady rearward pressure. We hold the gun firmly with our strong hand and fire it with our trigger finger moving smoothly straightback with ONLY the Trigger Finger moving. Most new shooters hit low and left of the bullseye and want to blame the firearm. It is difficult to accept, but the problem is not the firearm, the problem is the shooter. I’ve seen this many times, so don’t sell or return your firearm and don’t mess with the sights! The factory sights of most modern firearms are usually correct, probably 99% of the time. Accurate shooting is most likely fine with one hand. When you point your pistol using a normal two hand hold, your natural muscle reflexes try to compensate, thus you will be hitting low and left. To help this if you are right handed, rotate your right hand on the grip slightly to the left (clockwise). Now aim with a two-hand hold and it will help you hit the bullseye. Another cause for low and left shooting is that your gun grip could be too big for your hand. The solution could be to get another firearm with smaller grips or change them if you have different backstraps.
Another press tip that I learned from a tactical sniper was that he intensely focuses on moving ONLY the first joint of his trigger finger, keeping the second joint as straight as possible. This helps me, but is difficult to do consistently. The accurate shooter must learn to use the trigger finger independently of the rest of the fingers and hand while maintaining a constant, consistent, unchanging grip on the pistol. When enough pressure is applied to the trigger to disengage the sear, the gun fires. So easy to say, but difficult for me to do consistently.
A “Surprise Break” of the trigger is a good thing, since we do not want to anticipate the recoil or flinch. To accomplish the “Surprise Break” in training, first align the sights with the target and establish an appropriate Sight Picture. Next, focus visually on the front sight only while building constant, smooth pressure on the trigger until eventually the pistol fires by surprise. An important point is that the “break” of the trigger is not specifically expected by the shooter. He/she knows that it is going to break and is continuing constant pressure on the trigger. However, he/she does not know the exact instant when it will occur and you should not. If the shooter anticipates the break, or forces it to occur, he/she will invariably bear down on the weapon causing movement and flinching at the final moment of the shot. Sometimes not even realizing that he/she is doing this. Believe me I know this from experience. Thus the movement will cause the shot to go astray and be inaccurate. It’s not enough to know this; you have to practice it.
By mentally focusing your attention on the top edge of the FRONT sight while you press the trigger, you will be concentrating so much on alignment and Sight Picture with the front sight that when that trigger pressure is sufficient to cause the gun to fire, you will be surprised. Your attention will be on the Front Sight and not on the “bang” that just happened; a genuine surprise break.
In a combat situation where you must act quickly and not have the luxury of as much time as you want to press the trigger, you still should not overlook or deviate from the surprise break process. By spending time practicing and developing muscle memory, you become accustomed to this procedure and will not require a great amount of time to align, focus, and press the trigger. It should happen very quickly and naturally. Through regular practice, you will develop the muscle memory necessary to press the trigger in the same manner each time and experience the surprise break, but you will do it in less time.
(4) Reset Point: Once the gun fires, the shooter must maintain contact with the trigger and gradually release the finger from the trigger and place it safely back on the frame of the gun. Keep your finger off of the Trigger until you have eyes and sights on your target! Many new shooters, however, have the tendency to quickly take (jerk) their finger completely off the trigger the instant the gun fires and this must be overcome. While you need to keep your finger off of the Trigger and on the frame when eyes and sights are NOT on the target, there may be a second target/bad guy that requires an immediate follow-up shot. As soon as the shooter sees the front sight begin to lift, the bullet has exited the barrel and is in flight to the target. The shooter can no longer do anything to affect that shot, so he/she should maintain his/her follow through for a subsequent shot IF necessary. If not necessary after your scan and eyes are not on a threat, place your finger on the frame of the gun. After the shot, the first step is to relax the trigger finger’s pressure just enough to let the trigger return forward to its Reset point. That is normally a really short distance and there is usually an audible and tactile “click” when the trigger resets. Sometimes in the heat of “battle” you may not hear the click. I can usually feel the reset click. Generally, there is no need to let the trigger go farther forward than the Reset point. (However, some disagree with this.) Once the trigger is reset, the shooter can begin working on the delivery of the next shot.
M.T. Rayburn, S&W Pistol Adjunct Instructor with 29 years of LEO experience, has a controversial view of Trigger Control and says “Trigger Control may be important to target shooting skills, but not to the type of shooting we do as law enforcement officers. As police officers we are combat shooters, or at least we better be.” He says the leading problem is anticipating the recoil of the firearm, resulting in a Pre-Ignition Push (PIP), just before the ignition of the powder in the bullet, as the shooter pushes the front of the gun downward at the same time he pulls the trigger rearward. Further he says a number of firearms instructors have misdiagnosed this problem as poor trigger control, stating that the shooter “is not properly controlling the even, smooth pull of the trigger.” He says it may be misdiagnosed as a trigger control issue when it is a “heeling” problem where the shooter pushes the gun upward with the heel of his hand and the front of the handgun gets pushed up when flinching and anticipating recoil. First, you have to “recognize that the PIP problem is all in your head, nowhere else,” he says. You’ve subconsciously developed this “flinch” which results in the gun being pushed off target. You have to tell yourself, and be convinced, that you’re not going to do it. Rayburn says that “if you have to, just before you pull the trigger, tell yourself repeatedly that you’re not going to anticipate the recoil of the firearm. You have to believe that as long as you’re holding the gun properly and pointing it in the right direction, you’re not going to get hurt by the recoil, no matter how big of a bang the gun makes” he says.

To help correct the anticipation, the shooter should perform what’s called the “Ball & Dummy Drill.” Take two or three magazines and mix live rounds with dummy rounds or snap caps. Many people use the terms interchangeably, but they are different. Generally, a Snap cap will have a spring mechanism that will take the strike of the firing pin and cushion the strike. A-Zoom are the only ALL metal snap caps I am aware of and seem to last a long time… about 2-3,000 or so dry fires. Tipton also makes a bright red snap cap, as do others.
[box type=”note”]NOTE: Dummy Rounds usually do NOT have a spring mechanism and are inert training rounds used for action checks, feeding, and ejection and extraction drills. They are usually made of metal, like aluminum. Snap caps are usually plastic or another material and are made to cushion the firing pin when it falls when storing or dry-firing a gun. Dummy Rounds, and specifically military dummy rounds, look like real ammunition and have a real bullet or very similar-looking one in a different bright color seated in the case. The case may have “ribs” length-wise along the side (to show it’s a dummy) and NO PRIMER (and of course, NO POWDER inside.) These are meant for cycling, loading & unloading firearms and for training the proper way to load and work the firearm controls, but NOT for any kind of dry-firing. If you’re going to be pressing the trigger in practice, get the Snap-Caps, not the Dummy Rounds.[/box]
Probably best to let a shooting friend load the magazine for you so you will not know the sequence of live to snap caps or dummy rounds. Don’t peak at how it is being loaded. Make sure the rounds are mixed up when loading by placing one live, one dummy, two live, one dummy, etc. The first round loaded into the magazine should be a live one, since this allows the slide to lock back on an empty magazine. The ratio of dummy or snap caps to live rounds needs to be greatly skewed towards more dummy or snap caps to develop a good fundamental trigger press… moving the trigger straight to the rear while not disturbing the sights. Now mix the magazines up so you don’t know which ones are loaded which way. To accomplish the same task with a revolver, you can either randomly mix Snap Caps in with live ammunition in the cylinder or you can randomly leave a few empty holes where ammunition would ordinarily go. Before you close the cylinder, close your eyes and gently rotate the cylinder. Close the cylinder without looking, so that you do not know how the ammunition is lined up in your gun.
Once you’ve done this, place a magazine in your gun and begin firing one round at a time or start firing your revolver. When you get to the dummy or snap cap round, if you have a flinching or PIP problem, you’ll see the gun dip or pushed off to one side or the other or heel up. If this occurs, practice mentally telling yourself that you’re not going to anticipate the recoil. Continue the Ball and Dummy Drill until you’ve conquered your trigger control and flinching problem.
Another challenging drill to help with trigger control is to balance a dime on the top of your handgun just behind the front sight and practice dry firing to determine whether or not you are applying smooth, straight-back trigger press pressure. If the dime remains through dry firing, then the shooter must be providing a good stable platform and the correct trigger press. At first this is difficult to do, but you’ll be amazed at how quickly you can master it. The you can challenge yourself with a bigger coin, e.g. nickel or quarter.
Well, I hope my simple 1-2-3-4 Shooting Process and trigger control ideas will help you. I am still working on my fundamentals and recognize that practice and consistency equals improved accuracy. Continued SUCCESS!
Photos by Author.


