This is a very easy-to-remember, simple, and basic shooting drill for those who conceal carry a handgun. It is designed to help you with drawing or presenting from a concealed carry holster and garment, as well as improving your accuracy, speed, and techniques for shooting. Its purpose is to help you respond to a general concealed carry scenario and the usual four elements present. The 4 elements of the drill involve the number 4… thus the 44 Drill. Included are the typical distance involved between you and the bad guy or gal, the usual time consumed in a criminal assault, the average number of shots fired, and a challenging center mass target size. You must understand and integrate the fundamentals of shooting into the scenario drill, like proper grip, front sight focus, breath control, trigger control, follow through, etc.
Remember, SAFETY always comes first when handling, practicing with, and shooting a firearm. Also, recognize that many gun negligent discharges happen when drawing and re-holstering the handgun. In a very high number of my gun classes for new shooters, I have observed this happening in the classroom when students shoot the replica BB guns before we go to the range for live fire. For some reason, there are shooters who, after firing their shots, go back to their holsters very quickly. Why? Perhaps they think it just looks cool. Or maybe because they are not focusing on getting their trigger finger off the trigger and out of the trigger guard. We know that when the gun fires and the front sight comes off the target, the manual safety (if there is one) should be engaged and the trigger finger placed along the frame, out of the trigger guard. We know to only re-holster after the attacker is down (the target is hit) and there is no longer a threat. We have assessed our surroundings and searched for any remaining threats. We re-holster only when we are satisfied our situation is safe. So, there is every reason to re-holster slowly and carefully… a learned process that must be practiced. Re-holster slowly. Be very careful when you practice these drills or any drill or firearms technique.
Start slow and do not rush the steps and shots. You probably do not even need a stop watch or timer because speed is not of primary importance initially, since you should heavily focus on the fundamentals first. Let me repeat that… do NOT rush. At first, speed is not important. It is best to go slow and deliberate focusing on mastering the draw steps, techniques and fundamentals and then getting accurate target hits with speed later. Do not misinterpret this to mean that speed is not important, because it is. Here is a summary reminder of my 9 steps for Drawing from Concealed Carry (see my “Drawing from Concealed Carry: Steps & Tips” article on usacarry.com-1-2-14). No matter if drawing from an open OR closed garment, the shooter may use these basic 9 Steps in the Draw Process:
1. CLEAR the garment to quickly access the handgun; move garment out of the way;
2. GRIP the handgun properly & firmly (web of shooting hand between thumb & index finger should be placed very high on the backstrap underneath the beavertail; trigger finger straight along side of holster; 3 lower fingers together; thumb pointed forward & up high to create gap for support hand later);
3. LIFT the handgun straight up from the holster so it doesn’t drag while bringing support-hand opened with fingers extended (ready to receive shooting hand & gun later- however some like making a fist) close to center chest; strong elbow held high, close to body, and pointed backward; Do Not rotate the elbow out away from body since this will cause drag and bind;
4. ROTATE the handgun to the front & up (by moving strong elbow down to waist- lock the wrist of your gun hand) toward the threat/target without sweeping your support hand;
5. MEET & MOVE the support hand to the strong gun hand in a two-handed grip for support, switch safety off, & quickly assess the threat/target, with muzzle pointed toward threat/target; remember, you need to get both hands on the gun as early as possible in the process;
6. EXTEND arms & handgun straight out & fully forward at eye level with sights on target confirming sight picture; place finger on trigger; hold your breath;
Note: Eyes visually verify that gun is on target by use of the front sight and/or an approximate, rough placement of gun on blurry target, depending on distance & degree of precision desired in situation.
7. PRESS the trigger smoothly straight back & not intermittently, with only the trigger finger of hand moving, to take the shot IF deadly threat/target exists;
8. REMOVE finger from trigger to side of frame after shots and when eyes and sights are not on threats/target, lower muzzle some, breathe, SCAN & assess for other possible threats;
9. ENGAGE SAFETY & REHOLSTER slowly without looking at holster, in case another threat emerges.
Notes: (1) Beware of the natural tendency to quickly “speed reholster.” It is important to be certain that you do not need the handgun any more and determine the threat status. Lower the gun to the ready position and look for threats, then deliberately and slowly reholster.
(2) Recognize that most negligent discharges and accidents when working from the holster occur on REHOLSTERING and NOT from the actual draw or presentation.

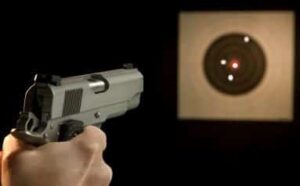
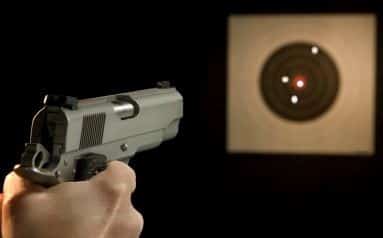
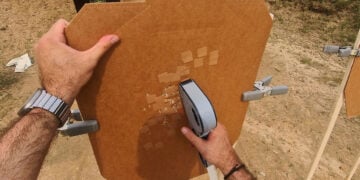
This 44 Drill is a pass-fail test for bringing together everything from your knowledge of shooting fundamentals and concealed carry draw to accuracy and speed. So you either pass by properly drawing your handgun and hitting all 4 shots anyplace on the 4-inch target in 4 seconds at a distance of 4 yards or you do not. An easy drill but a challenging task. Improving your time is not really a goal, since getting all your hits someplace on your small target in 4 seconds is your purpose that will do the job in a representative assault scenario. Don’t get discouraged with target misses when you start to practice the drill. Again, when you begin the drill your focus is almost totally on the fundamentals with accuracy and speed to follow. Just like with anything new in life or something you really want to master, you must thoroughly know the foundations and fundamentals FIRST. The basics are practiced over and over again when you begin. Then as you develop the skills, refine your techniques and basics and have genuine safety awareness, practice for speed as well as accuracy. All of these are important, but to me ACCURACY is key, with speed next, AFTER mastering the fundamentals. It is also best to get regular practice presenting your handgun from your Concealed Carry (CC) Holster to practice draw strokes and clearing your handgun from the holster. So, start slow and deliberate so the proper muscle memory basics can be ingrained. This drill presumes you are in a close-quarters tactical situation and are using a flash-sight picture aiming that quickly focuses on only the front sight, rather than a point shooting technique or long-range sight alignment of front and rear sights. For safety concerns and depending upon your experience level, you probably should initially begin this drill starting from the Low-Ready Position with the handgun pointed to the ground at a 45 degree angle in front of you. Then after you feel comfortable with the drill and scenario elements, you can move to drawing the handgun from a holster and a cover garment. You do need to practice this drill drawing from your holster and clearing your cover garment. You can even use paper plate targets without a bullseye or center mark and just aim for the inner circle of the plate, about 4 inches or so.
Here is my easy-to-remember, simple, and basic 44 Concealed Carry Drill:
- Fire 4 Shots
- In 4 Seconds (from CC holster & CC garment)
- At 4 ” Target
- Placed 4 Yards (12 feet) Away.
Remember, ALWAYS BE SAFE. Go slow at first and carefully and deliberately practice the fundamentals, techniques, and the draw presentation. Then progress to accuracy and then speed.
Continued success!
* This personal opinion article is meant for general information & educational purposes only and the author strongly recommends that you seek counsel from an attorney for legal advice and your own personal certified weapons trainer for proper guidance about shooting & using YOUR firearms, self-defense and concealed carry. It should not be relied upon as accurate for all shooters & the author assumes no responsibility for anyone’s use of the information and shall not be liable for any improper or incorrect use of the information or any damages or injuries incurred whatsoever.


